
Did you receive an Amazon Fire or phone for Christmas? If you did and you’re struggling to set-up your e-mail, the guide below should help.
Email Setup
You’ll need an e-mail account to sync with the Email app on your Fire phone. More than one account can be added, offering combined or single account views. After you set up your e-mail account, it will automatically sync with the Calendar and Contacts app (if supported by your e-mail provider) on your phone.
VIDEO: EMAIL, CALENDARS, AND CONTACTS
The Email app supports most POP, IMAP, and Exchange accounts, including Gmail, Outlook.com, and Yahoo! Mail, and will automatically populate server settings during setup for most popular e-mail providers. However, if you’re prompted to manually set up your e-mail account, you’ll need the e-mail settings for your provider.
- POP3 (Post-Office Protocol) – POP contacts your e-mail server and downloads e-mails from the server to your personal device. It will then delete the messages from the e-mail server (unless you’ve specified otherwise).
- IMAP (Internet Message Access Protocol) – IMAP contacts your e-mail server and syncs your Inbox across multiple devices. With IMAP, your e-mail messages and any folders you created stay on the e-mail server. When you search your e-mail, the search occurs on the e-mail server, which makes it easy to access your e-mail from any device or computer.
- Exchange – Exchange is an e-mail, calendar, and contact server developed by Microsoft that is typically used by businesses and organisations.
To set up an e-mail account:
Note: If no e-mail accounts have been added to the device yet, you will automatically start at step 3 below.
- From the Email app, access the left panel, and then tap Settings.
- Under Accounts, tap Add Account.
- Enter your e-mail address, and then tap Next.
- If your e-mail account isn’t recognised, you will see the Advanced Setup screen.
- For POP3 or IMAP accounts:
- Tap POP3 or IMAP at the top.
- Tap POP3 Server or IMAP Server, and then enter the server URL. For POP3, the URL is pop3.abc.com. For IMAP, the URL is smtp.abc.com.
- Tap Username, and then enter your username. Your username is typically your e-mail address.
- Tap SMTP Server, and then enter the outgoing SMTP server name (e.g. smtp.abc.com).
- Tap Security Settings and Ports. Verify that your Incoming and Outgoing Security Settings are correct. Consult your e-mail provider for the proper settings.
- For Exchange accounts:
- Tap Exchange at the top.
- Tap Exchange server, and then enter the server URL, which is exchange.mycompany.com.
- Tap Username, and then enter your username. Your username is typically your e-mail address without the domain (for example, johnsmith instead of johnsmith@domain.com).
- Tap Security Settings and Ports. Verify that your Incoming and Outgoing Security Settings are correct. Consult your e-mail provider for the proper settings.Note: Exchange often requires you to accept device policies as determined by your system administrator. If required, you will be prompted to accept policies such as a device PIN/Password and encryption. Follow the prompts to complete the account setup.
- For POP3 or IMAP accounts:
- After configuring your e-mail account, tap Go to Inbox to immediately view the account you just added, or tap Add Another Account to repeat these steps to add another e-mail account.
Note: If you’re unable to set up your e-mail account, you may need to contact your Internet service provider or system administrator to verify the information you’re entering is correct.
Setting up your e-mail on Kindle Fire HD
Setting up your e-mail on Kindle Fire HD involves providing information about one or more e-mail accounts that you’ve already established with a provider such as Gmail.
Follow these steps to set up an e-mail account the first time you use the app:
-
Swipe down from the top of the Home screen to display Settings.
The Quick Settings bar appears.
-
Tap More.
The Settings panel appears.
-
Tap My Account.
-
Tap Manage E-Mail Accounts.
-
Tap Add Account.
The dialogue box shown appears.
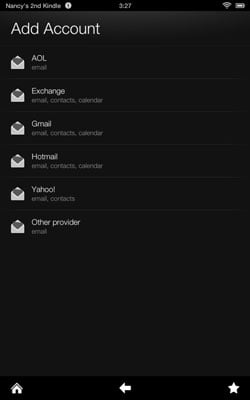
-
Tap AOL, Exchange, Gmail, Hotmail, Yahoo!, or Other Provider.
-
Enter your username, e-mail address, and password in the appropriate fields, and then tap Next.
A new screen appears, displaying two fields.
-
Enter the name that will appear on outgoing messages in the Name field and an address in the E-Mail Address field for your e-mail account.
The account name is optional.
-
Enter the password for your e-mail account in the Password field.
-
Tap the Send Mail from This Account by Default checkbox if you want to set this up as your default e-mail account, and then tap Next.
-
If a message appears about how some accounts sync with your Kindle Fire HD, tap OK to proceed.
-
In the final screen, tap Save and then tap the View Inbox button to go to the inbox for the account you just set up.
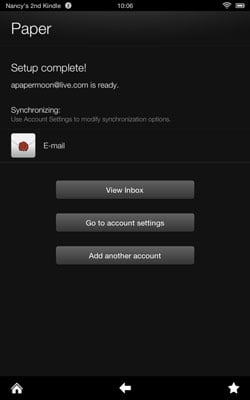
You can set up as many e-mail accounts as you like. When you open the Kindle Fire HD Email app, you see a Unified Inbox that combines messages from all accounts you set up, as well as individual inboxes for each account.