
With so many different models of iPhone currently available on the market, it is little wonder that people often get a little confused when it comes to adding their e-mail account to a new phone. However, the good news is that regardless of the version of iPhone that you have, the process is almost identical from phone to phone.
By following our step by step guide, you will be able to add your existing e-mail account to your phone with the absolute minimum of fuss.
Please Note – The instructions below are correct as of 4th October 2019.
To configure your account on iPhone, please do the following:
How to set up your email account automatically
If you use an email provider like iCloud, Google, or Yahoo, Mail can automatically set up your email account with just your email address and password. Here’s how:
- Go to Settings > Passwords & Accounts.
- Tap Add Account, then select your email provider.
- Enter your email address and password.
- Tap Next and wait for Mail to verify your account.
- Choose information from your email account, like Contacts or Calendars.
- Tap Save.
If you don’t see your email provider, tap Other to add your account manually.

How to set up your email account manually
If you need to set up your email account manually, make sure that you know the email settings for your account. If you don’t know them, you can look them up or contact your email provider. Then follow these steps:
- Go to Settings > Passwords & Accounts.
- Tap Add Account, tap Other, then tap Add Mail Account.
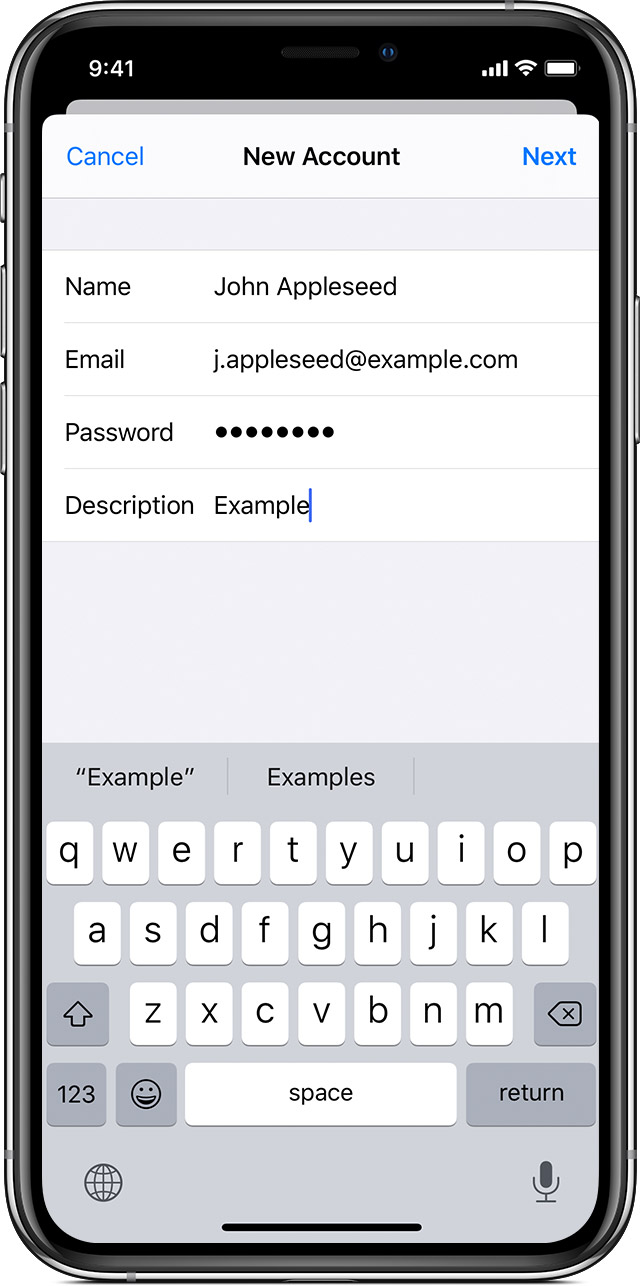
- Enter your name, email address, password, and a description for your account.
- Tap Next. Mail will try to find the email settings and finish your account setup. If Mail finds your email settings, tap Done to complete your account setup.
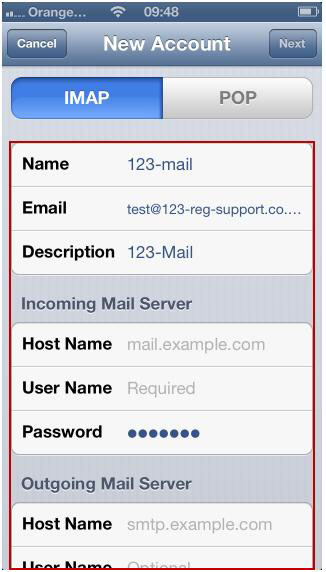
![]()
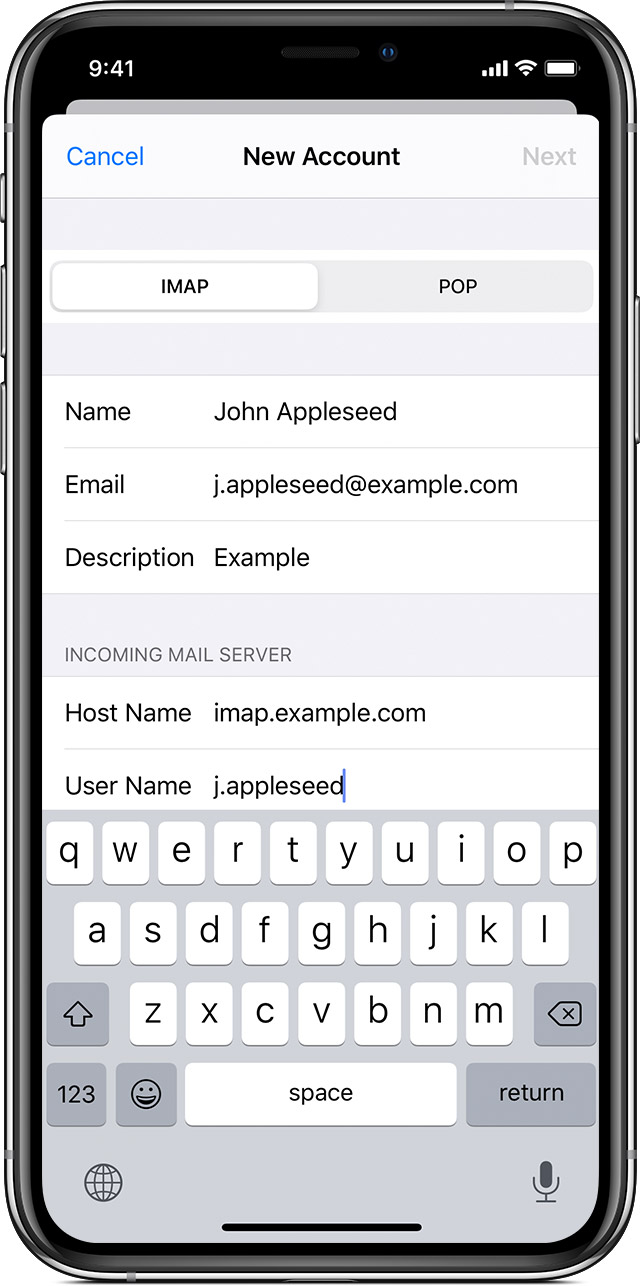
Enter account settings manually
If Mail can’t find your email settings, then you need to enter them manually. Tap Next, then follow these steps:
- Choose IMAP or POP for your new account. If you aren’t sure which one to choose, contact your email provider.
- Enter the information for Incoming Mail Server and Outgoing Mail Server. Then tap Next. If you don’t have this information, try to look it up or contact your email provider.
- If your email settings are correct, tap Save to finish. If the email settings are incorrect, you’ll be asked to edit them.
If you still can’t set up your email account or save your email settings, contact your email provider.
Learn more about Mail
- If you can’t send or receive emails, learn what to do.
- Learn more about using a POP email account.
- If you don’t know your email settings, try to look them up.
- Learn how to set up an Exchange account.
Old Instructions
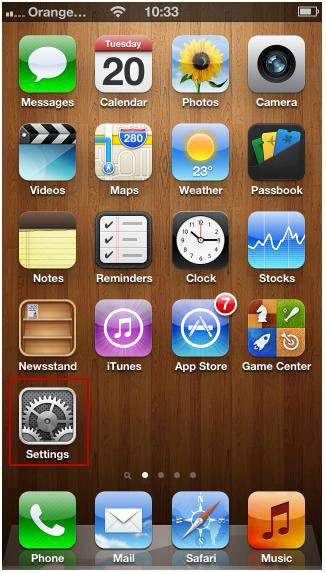
If you are using an older version of the iPhone, please refer to the details below:
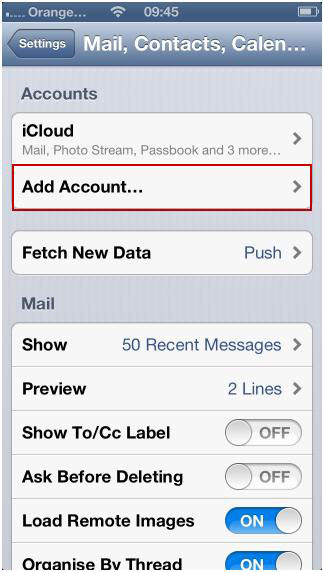
Step 1 – Click on the settings button on your iPhone.
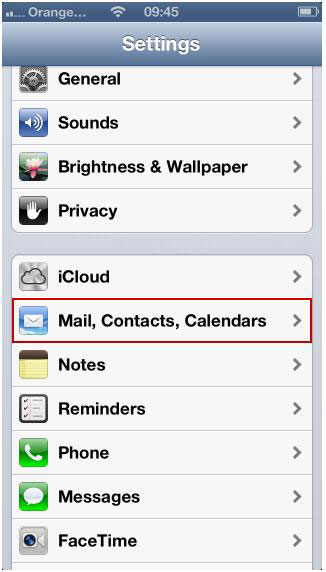
Step 2 – Then click on the ‘Mail, Contacts, Calendars’ options.
Step 3 – The next step is to click on the ‘Add Account’ option.
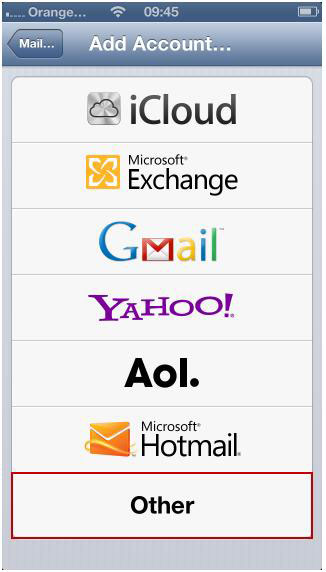
Step 4 – Then choose the ‘Other’ option bottom of the iPhone’s menu.
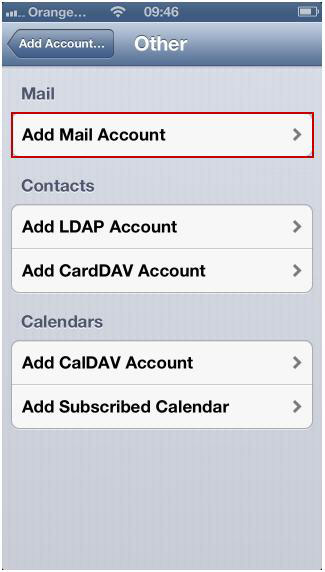
Step 5 – Once you have done that, then choose ‘Add Mail Account’ option at the top of the screen.
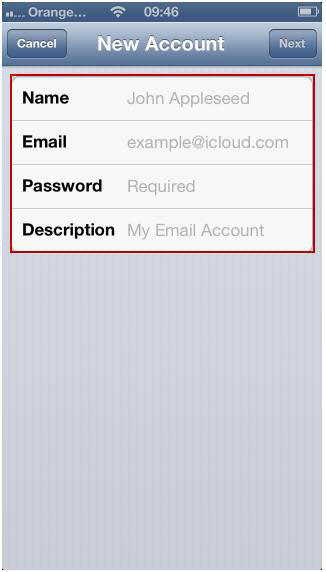
Step 6 – The next step is to complete the form by filling in the following details
- Name e.g David Smith.
- Email Address in the Address box i.e david@mydomain.com.
- Password for this email address.
- Description of your choice like david@mydomain.com.
Step 7 – The next stage is to decide whether you would like to use the POP3 or IMAP email protocol.
Please Note – If you are unsure which protocol will be best for your circumstances, please refer to the ‘E-Mail‘ section of our blog for further information.
Once you have done this you can move onto to step 8
Step 8 – Enter the information below into the relevant areas
Incoming Mail Server
Host Name:
If you selected POP in Step 7: pop.mydomain.com
User Name: This should be your email address i.e john@mydomain.com
Password: This should be your password for this email address.
Outgoing Mail Server
Host Name: smtp.mydomain.com
User Name: This should be your email address i.e david@mydomain.com
Password: This should be your password for this email address.
Step 9 – Click Next
Step 10 – If you receive an error stating “Cannot Connect Using SSL”, select Yes to setup the account without SSL.
Step 11 – Click ‘Continue’ to complete the set-up and you should be good to go!