
This tutorial will help you setup your Mac Mail client with your email settings.
Use the Mail app to send, receive and manage email for all of your email accounts in one location. Simply add the accounts — such as iCloud, Exchange, Google, school, work or other — you want to use in Mail.
Please Note – The instructions below are correct as of 4th October 2019.
Add an email account
- The first time you open the Mail app
 on your Mac, it may prompt you to add an account. Select an account type — if you don’t see your type, select Other Mail Account — then enter your account information.

- If you already added an email account, you can still add more. In Mail, choose Mail > Add Account, select an account type, then enter your account information. Make sure the Mail tickbox is selected for the account.
- If you’re using an account on your Mac with other apps, such as Contacts or Messages, you can also use that account with Mail. In Mail, choose Mail > Accounts to open Internet Accounts preferences, select the account on the left, then select the Mail tickbox on the right.
Temporarily stop using an email account
- In the Mail app on your Mac, choose Mail > Accounts.
- Select the account, then deselect the Mail tickbox.Now the account’s messages are not shown in Mail.
To use the account again with Mail, select the Mail tickbox; the account’s messages are shown again (they don’t need to be downloaded from the server again).
Remove an email account
When you remove an email account from Mail, the account’s messages are deleted and no longer available on your Mac. Copies of messages remain on the account’s mail server and are still available (from webmail, for example).
Important: If you’re unsure whether messages you want to keep are still on the mail server, move or copy them to a mailbox stored on your Mac (the mailbox appears in the On My Mac section in the Mail sidebar) before you delete the account in Mail.
- In the Mail app on your Mac, choose Mail > Preferences, then click Accounts.
- Select an account, then click the Remove button .
Note: If the account is used by other apps on your Mac, you’re asked to remove the account in Internet Accounts System Preferences. Click the button to open Internet Accounts, then deselect the Mail tickbox for the account. To stop using the account in all apps, make sure the account is selected, then click the Remove button
.
Old Instructions
Add an email account
- The first time you open the Mail app on your Mac, it may prompt you to add an account. Select an account type — if you don’t see your type, select Other Mail Account — then enter your account information.
- If you already added an email account, you can still add more. In Mail, choose Mail > Add Account, select an account type, then enter your account information. Make sure the Mail tickbox is selected for the account.
- If you’re using an account on your Mac with other apps, such as Contacts or Messages, you can also use that account with Mail. In Mail, choose Mail > Accounts to open Internet Accounts preferences, select the account on the left, then select the Mail tickbox on the right.
Temporarily stop using an email account
- In the Mail app on your Mac, choose Mail > Accounts.
- Select the account, then deselect the Mail tickbox.Now the account’s messages are not shown in Mail.
To use the account again with Mail, select the Mail tickbox; the account’s messages are shown again (they don’t need to be downloaded from the server again).
Remove an email account
When you remove an email account from Mail, the account’s messages are deleted and no longer available on your Mac. Copies of messages remain on the account’s mail server and are still available (from webmail, for example).
Important: If you’re unsure whether messages you want to keep are still on the mail server, move or copy them to a mailbox stored on your Mac (the mailbox appears in the On My Mac section in the Mail sidebar) before you delete the account in Mail.
- In the Mail app on your Mac, choose Mail > Preferences, then click Accounts.
- Select an account, then click the Remove button .
Note: If the account is used by other apps on your Mac, you’re asked to remove the account in Internet Accounts System Preferences. Click the button to open Internet Accounts, then deselect the Mail tickbox for the account. To stop using the account in all apps, make sure the account is selected, then click the Remove button
.
For older versions, please follow the details below:
Add your email account
If you don’t have an email account set up, Mail prompts you to add your email account. To add another email account, follow these steps:
- Open Mail.
- Choose Mail > Add account.
- Choose your email provider from the list, then click Continue.
- Enter your name, email address, and email password, then follow the onscreen instructions.
If necessary, Mail might ask you for additional settings. These can be found below:
Mail settings you might need from your email provider
If Mail asks you to enter email settings manually, you may need to get the account type, mail server address, and other details listed in this article.
| Name of setting | Setting | Description |
|---|---|---|
| Full Name | Choose your sender name as you would like it to appear in messages that you send. Example: John Appleseed. | |
| Email Address | Your email address for this account, such as appleseed@example.com. | |
| Incoming mail server settings | ||
| These settings are for downloading messages (receiving email) from your email provider’s mail server. | ||
| Account Type | Choose IMAP*, POP, Exchange IMAP, or Exchange EWS1, as directed by your email provider. If you’re using a Microsoft Exchange account, see the Exchange setup instructions for Mac or iPhone, iPad, and iPod touch. | |
| Description | Choose the name that Mail will use for your account, such as Work, School, or Yahoo. | |
| Incoming Mail Server (host name) | The host name of the incoming mail server, such as mail.example.com. | |
| User Name | Your user name for this account, such as appleseed. Some email providers want your full email address as your user name. | |
| Password | The email password you use to sign in to your account. | |
| Port | The port number used by the incoming mail server. Common port numbers for incoming mail are 143 and 993 for IMAP accounts, and 110 and 995 for POP accounts. | |
| Authentication | Choose Password, MD5, NTLM, Kerberos, or None, as directed by your email provider. | |
| Use SSL? | Does the incoming mail server support SSL (Secure Sockets Layer) or TLS (Transport Layer Security) encryption? | |
| Outgoing mail server (SMTP) settings | ||
| These settings are for uploading messages (sending email) to your email provider’s mail server. | ||
| Outgoing mail server (SMTP) | The host name of the outgoing SMTP (Simple Mail Transfer Protocol) server, such as smtp.example.com. | |
| Port | The port number used by the outgoing mail server. Common port numbers for outgoing mail are 25, 465, and 587. | |
| Use SSL? | Does the outgoing mail server support SSL or TLS encryption? | |
| Authentication | Choose Password, MD5, NTLM, Kerberos, or None, as directed by your email provider. If None, you may need the additional settings below to send email when you’re on a different network, such as from a Wi-Fi hotspot or Internet cafe. | |
| Outgoing mail server (SMTP) settings for when you’re on a different network | ||
| Get these off-network settings only if your email provider doesn’t use authentication for outgoing mail. | ||
| Outgoing Mail Server (SMTP) | The host name of the outgoing mail server, such as smtp.example.com. | |
| Port | The port number used by the outgoing mail server. | |
| Use SSL? | Does the outgoing mail server support SSL or TLS encryption? | |
| Authentication | Choose Password, MD5, NTLM, Kerberos, or None, as directed by your email provider. | |
* IMAP (Internet Message Access Protocol) is best if you check email from multiple devices, because your messages are stored with your email provider until you delete them. As long as your devices can connect to your email service, your mailbox stays the same on each device. If you use POP (Post Office Protocol) on more than one device, those changes don’t appear on every device, and new messages delivered to one device may not be delivered to your other devices.

Send and reply
Learn how to compose, reply to, and forward email.
Send new messages
- Click New Message in the Mail toolbar, or choose File > New Message.
- Enter a name, email address, or group name in the “To” field. Mail gives suggestions based on your contacts and messages on your Mac and devices signed into iCloud.1
- Enter a subject for your message.
- Write your email in the body of the message.
- To add an attachment, drag an attachment to the body of the message, or choose File > Attach Files, choose an attachment, then click Choose.
- To change your font and format, use the options at the top of the message window.
- Send or save your message:
- To send, click or choose Message > Send.
- To save your message as a draft for later, close the message, then click Save.
- To send, click
Reply and forward
- To reply to a single person, click Reply , type your response, then click Send .
- To reply to everyone on a group email, click Reply All , type your response, then click Send .
- To forward a message to other people, click Forward , type your response, then click Send .
Organise and search
Sort your emails into folders and use multiple search options to find specific messages.
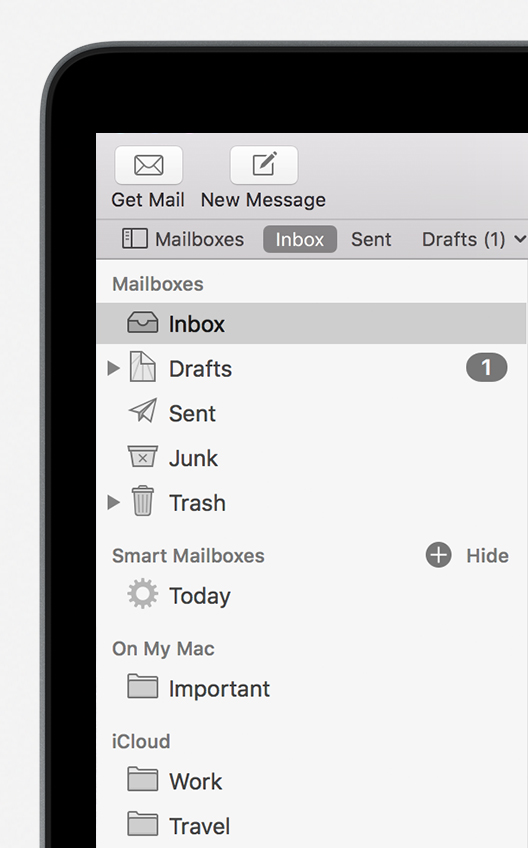
Create folders
You can create Mailboxes to organize your emails into folders.
- Open Mail, then from the menu bar at the top of your screen, choose Mailbox > New Mailbox.
- Choose the location for the Mailbox in the dialog that appears:
- Choose your email service (like iCloud) to access your Mailbox on your other devices, like an iPhone signed into the same email account.
- Choose On My Mac to access your Mailbox only on your Mac.
- Name the mailbox and click OK.
If you don’t see the mailboxes sidebar, choose View > Show Mailbox List. To show or hide mailboxes from an email account, move your pointer over a section in the sidebar and click Show or Hide.
Sort your emails
- To move a message from your Inbox to a mailbox, drag the message onto a mailbox in the sidebar.
- To delete a message, select a message, then press the Delete key.
- To automatically move messages to specific mailboxes, use rules.
Search
Use the Search field in the Mail window to search by sender, subject, attachments, and more. To narrow your search, choose an option from the menu that appears as you type.

Add and mark up attachments
Attach documents and files to your messages and use Markup to annotate, add your signature, and more.
Attach a file
There are a number of ways to attach a file to your message:
- Drag an attachment to the body of the message.
- Choose File > Attach Files, choose an attachment, then click Choose.
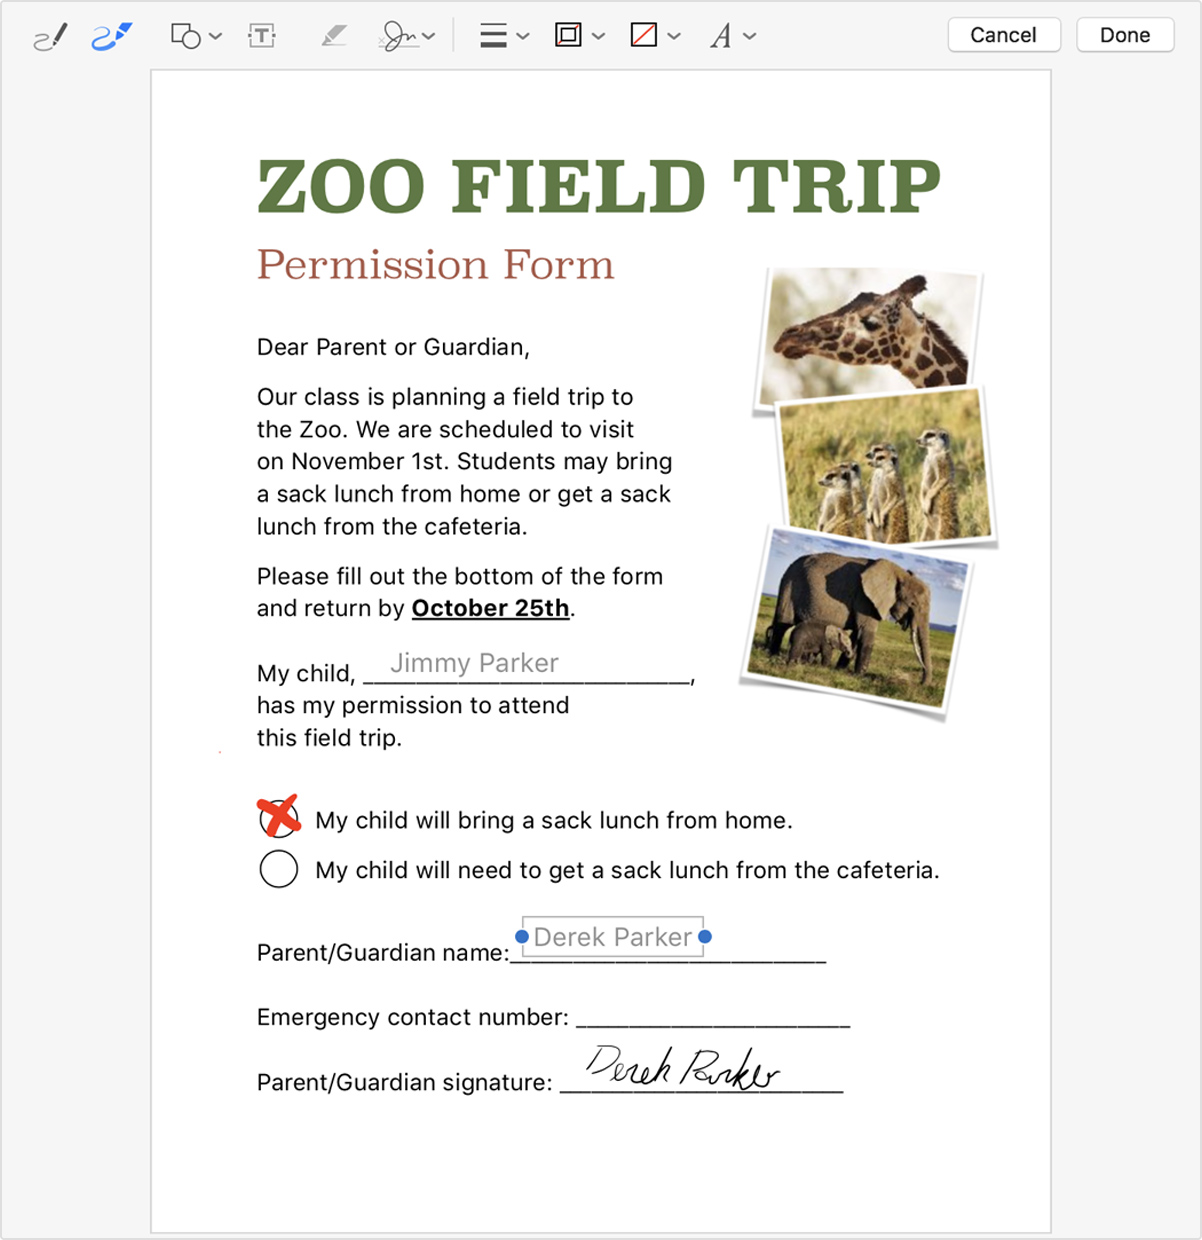
Use Markup with your attachments
You can use Markup to draw and type directly on an attachment, like an image or a PDF document.2
- Click Attach or choose File > Attach Files in the message window.
- Choose an attachment, then click Choose File.
- Click the menu icon that appears in the upper-right corner of the attachment, then choose Markup. These are some of the markup tools available:
- Use the Sketch tool to create freehand drawings.
- Use the Shapes tool to add shapes like rectangles, ovals, lines, and arrows.
- Use the Zoom tool in the Shapes menu to magnify and call attention to a part of an attachment.
- Use the Text tool to add text.
- Use the Sign tool to add your signature.
- Use the Sketch
- Click Done.
For more information, please click here.
Further Information
Footprint specialise in creating bespoke websites designed to help take your business to another level. We have been providing SEO Surrey since 1998 and if you’d like to speak to us regarding any of our services, give us a call on 01883 372488 or contact us via Facebook and we’ll be happy to talk you through your options.