
How To Add An Email account to your iPhone or iPad
There are two ways you can set up an email account in the Mail app on your iOS device – automatically or manually. Find out which option is best for you.
How to set up your email account automatically
If you’re using an email provider such as iCloud, Google or Yahoo, Mail can set up your email account automatically with just your email address and password. Here’s how:
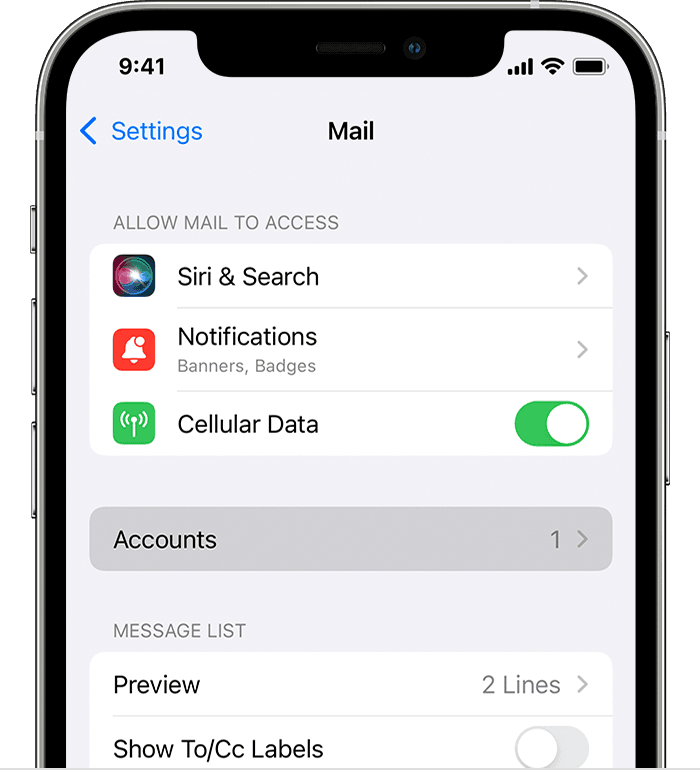
- Go to Settings > Mail, then tap Accounts.

- Tap Add Account, then select your email provider.
- Enter your email address and password.
- If you see Next, tap it and wait for Mail to verify your account.
- If you see Save, tap it.
If you can’t see your email provider, tap Other to add your account manually.

How to set up your email account manually
If you need to set up your email account manually, make sure you know the email settings for your account. If you don’t know them, you can look them up or contact your email provider. Then follow these steps:
- Go to Settings > Mail, then tap Accounts.
- Tap Add Account, tap Other, then tap Add Mail Account.
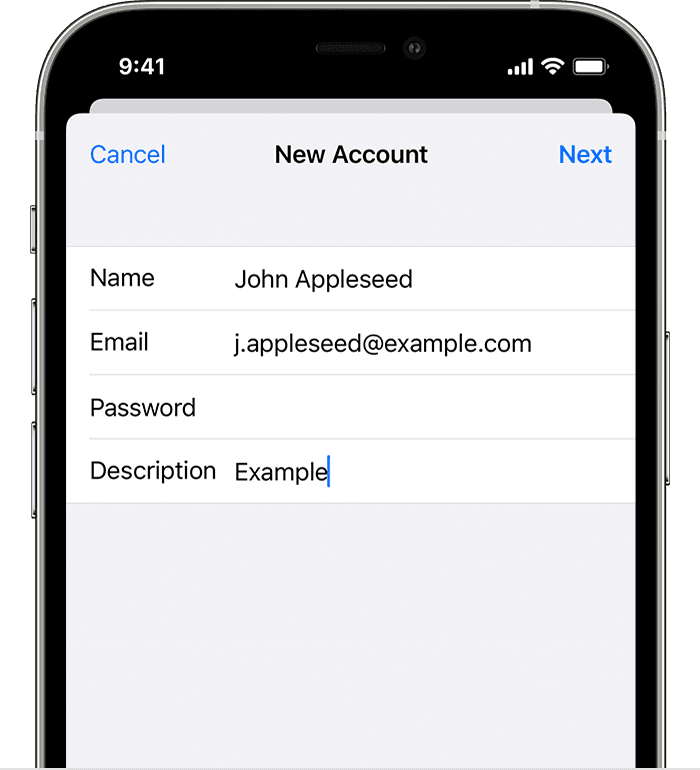
- Enter your name, email address, password and a description for your account.
- Tap Next. Mail will try to find the email settings and finish setting up your account. If Mail finds your email settings, tap Done to finish the account setup process.
![]()
Enter account settings manually
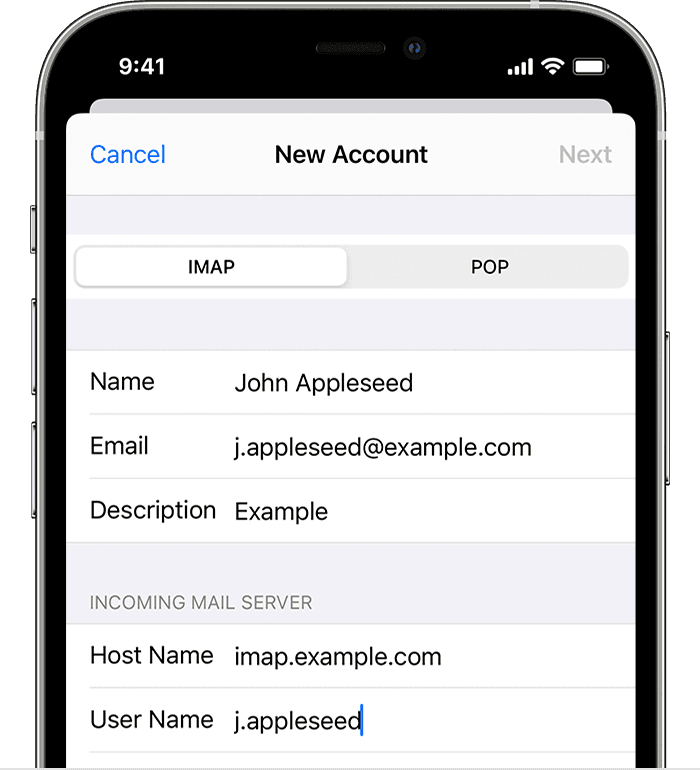
If Mail can’t find your email settings, you will need to enter them manually. Tap Next, then follow these steps:
- Choose IMAP or POP for your new account. If you’re not sure which one to choose, contact your email provider.
- Enter the information for Incoming Mail Server and Outgoing Mail Server. Then tap Next. If you don’t have this information, try looking it up.
- If your email settings are correct, tap Save to finish. If the email settings are incorrect, you’ll be asked to edit them.
If you still can’t set up your email account or save your email settings, contact your email provider.
Further Information
If you’d like to speak to us regarding any of our services, please give us a call on 01883 372488 or contact us via Facebook and we’ll be happy to talk you through your options.
Currently Browsing: How To Add An Email account to your iPhone or iPad
How To Set up email in Mac OS X Mail
If just want to manage your Exchange email account on the Mac, you can use the Mac Mail app to connect to your account using Internet Message Access Protocol (IMAP) or Post Office Protocol (POP).
Set up Exchange account access using Outlook for Mac
If you have Outlook for Mac, you can use it to access your Exchange account. See Add an email account to Outlook for instructions.
Set up Exchange account access using Mac OS X 10.10 or later
If you’re running Mac OS X version 10.10 or later, follow these steps to set up an Exchange email account:
- Open Mail, and then do one of the following:
- If you’ve never used Mail to set up an email account, the Welcome to Mail page opens. Go to step 2.
- If you’ve used Mail to create email accounts, select Mail > Add Account.
- Select Exchange > Continue.
- Enter the name, email address and password for your Exchange account > Sign In.
- Choose the Mac apps you want to use with this account. Available choices are Mail, Contacts, Calendar, Reminders, and Notes.
- Click Done.
If the Mail program isn’t able to set up your account automatically, wait a few minutes or a few hours, and then repeat these steps. If after repeating the steps Mail still isn’t able to set up your account automatically, see What else do I need to know? in this article.
Set up POP or IMAP on Mac OS X
If you just want to manage your Exchange email on the Mac, you can also set up POP or IMAP access to your account.
- Open Mail, and then do one of the following:
- If you’ve never used Mail to set up an email account, the Welcome to Mail page opens. Go to step 2.
- If you’ve used Mail to create email accounts, on the Mail > Add Account.
- Select Other Mail Account > Continue.
- Enter the name, email address and password for your account > Sign In.
- If you see Unable to verify account name or password, select Next to enter your settings manually.
- Enter the following details
- In the Email Address and User Name boxes, type your email address.
- In the Password box, type the password for the email account.
- In Account Type , choose IMAP or POP. IMAP supports more features.
- In Incoming Mail Server, type the IMAP or POP3 server name. If you’re connecting to your Microsoft 365 email, the IMAP or POP server name is outlook.office365.com. If you’re not using Microsoft 365, see POP and IMAP email settings for Outlook.
- In Outgoing Mail Server, type the SMTP server name. If you’re connecting to your Microsoft 365 email, the SMTP server name is smtp.office365.com. If you’re not using Microsoft 365, see POP and IMAP email settings for Outlook.
- Click Sign In.
Note: If the mail account configuration isn’t successful, repeat step 4 and try again.
- Next choose the Mac apps you want to use with this account. Available choices are Mail and Notes.
- Click Done.
What else do I need to know?
- Some issues are resolved just by updating to the latest available released version of Mac OS X. See the Apple web site for update instructions.
- Connecting to your email account through Mail for Mac may fail if you haven’t registered your account. If your email account is the type that requires registration, you can register it the first time you sign in to Outlook on the web. After you sign in to your account, sign out. Then try to connect using Mail for Mac. For more information about how to sign in to your account using Outlook Web App, see Sign in to Outlook.
- If your account isn’t set up after following the steps in this article, contact your help desk.
Further Information
If you’d like to speak to us regarding any of our services, please give us a call on 01883 372488 or contact us via Facebook and we’ll be happy to talk you through your options.
Currently Browsing: How To Set up email in Mac OS X Mail
How To Setup A Facebook or Instagram Shop
With Facebook Shops, you can display and sell products on Facebook and Instagram. People who visit your shop can browse your products, make purchases and get to know your brand. You’ll create your shop in Commerce Manager, a platform that you’ll use to manage your inventory and sales on Facebook and Instagram.
You can choose one of three checkout methods for people to purchase your products: On your business website, with Checkout on Facebook and Instagram (US only), or through messaging.
Before you begin
To set up a shop on Facebook and Instagram:
-
If you don’t have a Facebook business Page or catalogue yet, you can create both when you set up your shop.
-
If you already have a Page and catalogue that you want to use for your shop:
-
Make sure that you have manage Page permissions for the Page. If you manage your Page and catalogue in a Business Manager account, you’ll need to be an admin on the account.
-
-
If you want to make your shop visible on Instagram, you’ll also need an Instagram business account. Your Business Manager must own the Instagram business account and the Page that it’s connected to.
Create your shop
To create your shop in Commerce Manager:
- Go to the Create your shop page and click Next.
- Choose one of the three checkout methods. Click Next.
- Select the Facebook business Page that you want to sell from, or create a new Page if you don’t have one yet. If you also want to sell on Instagram, select your Instagram business account. Click Next.
- Select your Business Manager account or create a new one. Click Next.
- Select the catalogue that you want to use for your shop and click Next. You can’t switch this catalogue later.
-
Note: If you don’t already have a catalogue, you won’t see this step. We’ll create a catalogue for you automatically in Commerce Manager called “Items for (name and ID of your Page)”. You can add your items later when you’ve finished setting up your shop.
-
- Look over your shop details, review and agree to the Seller Agreement and click Finish setup.
You’ve now created your shop. Next, you’ll want to:
-
Manage your catalogue to add any products you want to sell.
-
Create a collection, a group of products you want to feature in your shop.
-
Publish your shop. People can see your shop once we’ve reviewed and approved your collections.
Further Information
If you’d like to speak to us regarding any of our services, please give us a call on 01883 372488 or contact us via Facebook and we’ll be happy to talk you through your options.